It’s time to learn the art of… macrame plant hangers! I’m noticing more and more of these in the plant community lately.
Then again, macrame plant hangers have always been around. My coworker says she recalls seeing these in the 80s, as all things macrame were quite popular then. Wall art, furniture, and plant hangers are only a few of the fun things you can create.
Now, circling back to the year 2020, we see this hot trend on the rise again. Not only is macrame a crafty way to pass the time at home, but it can be very practical for plant owners. Think of the many air plants and trailing plants that benefit from a hanging pot.
Some people have limited floor and table space in the home, too, so the only way to move is up!

I ordered a macrame kit online, which came with 327 feet of cord (3 mm width), wooden beads, hanger sticks, and hanger rings.
Regular cotton clothesline could make a decent substitute instead of cord, but the texture might be stiffer and less flexible for small knots.
I had a surprisingly difficult time finding macrame supplies at our local craft store… as in I could not find any. Perhaps I was searching the wrong aisles, but cotton cord and hanger rings were nowhere obvious. After asking for help, the closest thing we found were yarn and burlap twine.
In the end, it was easier and cheaper to order a macrame kit online. You can guarantee the correct length of cord that way, too.

You will need a lot of cord! This plant hanger requires eight strands that measure 13 feet each. So that equals 104 feet total.
(You could probably get away with less. Like say, 12 feet each, 96 feet total, but it doesn’t leave as much room for error.)
At 13 feet, these strands are quite long. What I did was measure out 6.5 feet of cord with a measuring tape, folded that cord over and matched its length, then cut the strand.
After cutting one strand, use that strand as a template for your seven other cords.

I am a shorter person, so dragging these cords around the house was unwieldy. Squid monitored the situation closely and took great interest in these strings.


After cutting eight cords, take the first one and fold it perfectly in half. It helps to start at the cut-off ends to align them evenly, then work your way upwards to the fold.
Loop the first cord through the hanger ring.
Pro tip: It helps to hang the ring somewhere elevated while you work. A coat hook on the back of a door would be helpful.
I was down in Ian’s workshop when I started and improvised with a table clamp.

Repeat the process and loop all eight cords through the hanger ring.
By the way, this ring is slightly more than 2-inches wide. A smaller ring is probably okay, but this seemed right for the project.

This plant hanger pattern is super easy, because it only requires one type of knot: the square knot.
The macrame square knot is made from a grouping of four strings. As we go through the project, you’ll see this grouping appear a lot.
To make a square knot, start with the four strings on the far left.


Pull the left-most string in front, making a “4” shape.
Place the right-most string on top of that.
Tuck the right string underneath, then pull through the left loop. Like a pretzel. It makes more sense when you are doing the action.

Pull the knot snug by tugging the outer strings. Push the knot upward to the top.
Okay, half of the square knot is done.


Now repeat, except start at the opposite side of the grouping.
Make a “4” shape with the right-most string. Put the left-most string on top of that. Tuck the left string under, then pull through the right loop.

Tug the outer strings to make the knot snug, and push the knot upwards.
The first square knot is complete!

Repeat the process with the other groupings of four until you have four square knots in the first row.


In the next row, ignore the first two strings on the far left.
Grab the next four strings as a grouping. Half should come from the knot on the left, and half from the knot on the right.
Create a square knot from that grouping.

This row will have three knots total. Ignore the last two strings on the far right.
The row after this will have four knots again. So the ultimate plan looks like: 4 knots, 3 knots, 4 knots.
Or for visual learners, like this:
X-X-X-X
-X-X-X-
X-X-X-X

Can you see the 4-3-4 pattern here? There are no rules saying how many knots you need for a row, but I like this checkered pattern fine enough.
(Another pattern you could try out is 1-2-3-4-3-2-1, which creates a diamond. Or you could try 4-4-4, which is a straight pattern of knots. The possibilities are endless. Try mapping out new designs with Xs on a paper.)
I learned this next tip from watching videos. When you have a gap area with no knots, use painters tape to keep that area straight and flat.

Add another row of square knots below the painters tape. The gap from painters tape can be as short or long as you want.

You can see why it’s called a square knot from looking at this photo. Very square.

So I repeated the process a few times. In retrospect, it would have been nice to go a little longer with one more round of painters tape and knots, but that’s fine.

Next up, measure around ten inches of string. We are moving into the next phase, which is the part that hangs directly above the pot.


After measuring ten inches, I put down painters tape again, then a row of square knots.
I slipped wooden beads in the center two strings of each grouping. The beads provided in the kit were completely randomized. Matching beads would have been nice, but these do alright.
I secured them with another row of square knots.

Measure around six inches below that. Now we are going to create the netting that goes around the pot, which is very simple.

Create three square knots with the groupings in the center.
Pull the outer strings towards you. The left two and right two make a new grouping of four. Create a square knot out of them.

Maybe it’s hard to see, but the square knots we created here should borrow half and half from the square knots above.

Almost done. A little ways below that, maybe around three inches or so, create one giant knot with all the strings.
This knot is the base that the pot will sit on.
(Note: the wider the pot, the farther down you should go before tying the big knot. Go half the diameter of the pot. So if using a 6-inch wide pot, move down three inches.)


This is a neat trick. Pull the knot tight by tugging each string individually. Go one by one until you tightened them all.
Do this to the strings both below and above the big knot, so it’s nice and secure. It’s oddly satisfying getting this tidy.


I had a lot of string leftover. This project could have used a foot less of cord, but I think 13 feet total is still a good starting point. It’s better to have leftover instead of not enough. As mentioned above, I wish I added another round of knots and painters tape before starting the netting portion.
I trimmed about a foot of cord off to make the ends even.

Next, I unraveled the cords and brushed through them to make the tail fluffier.

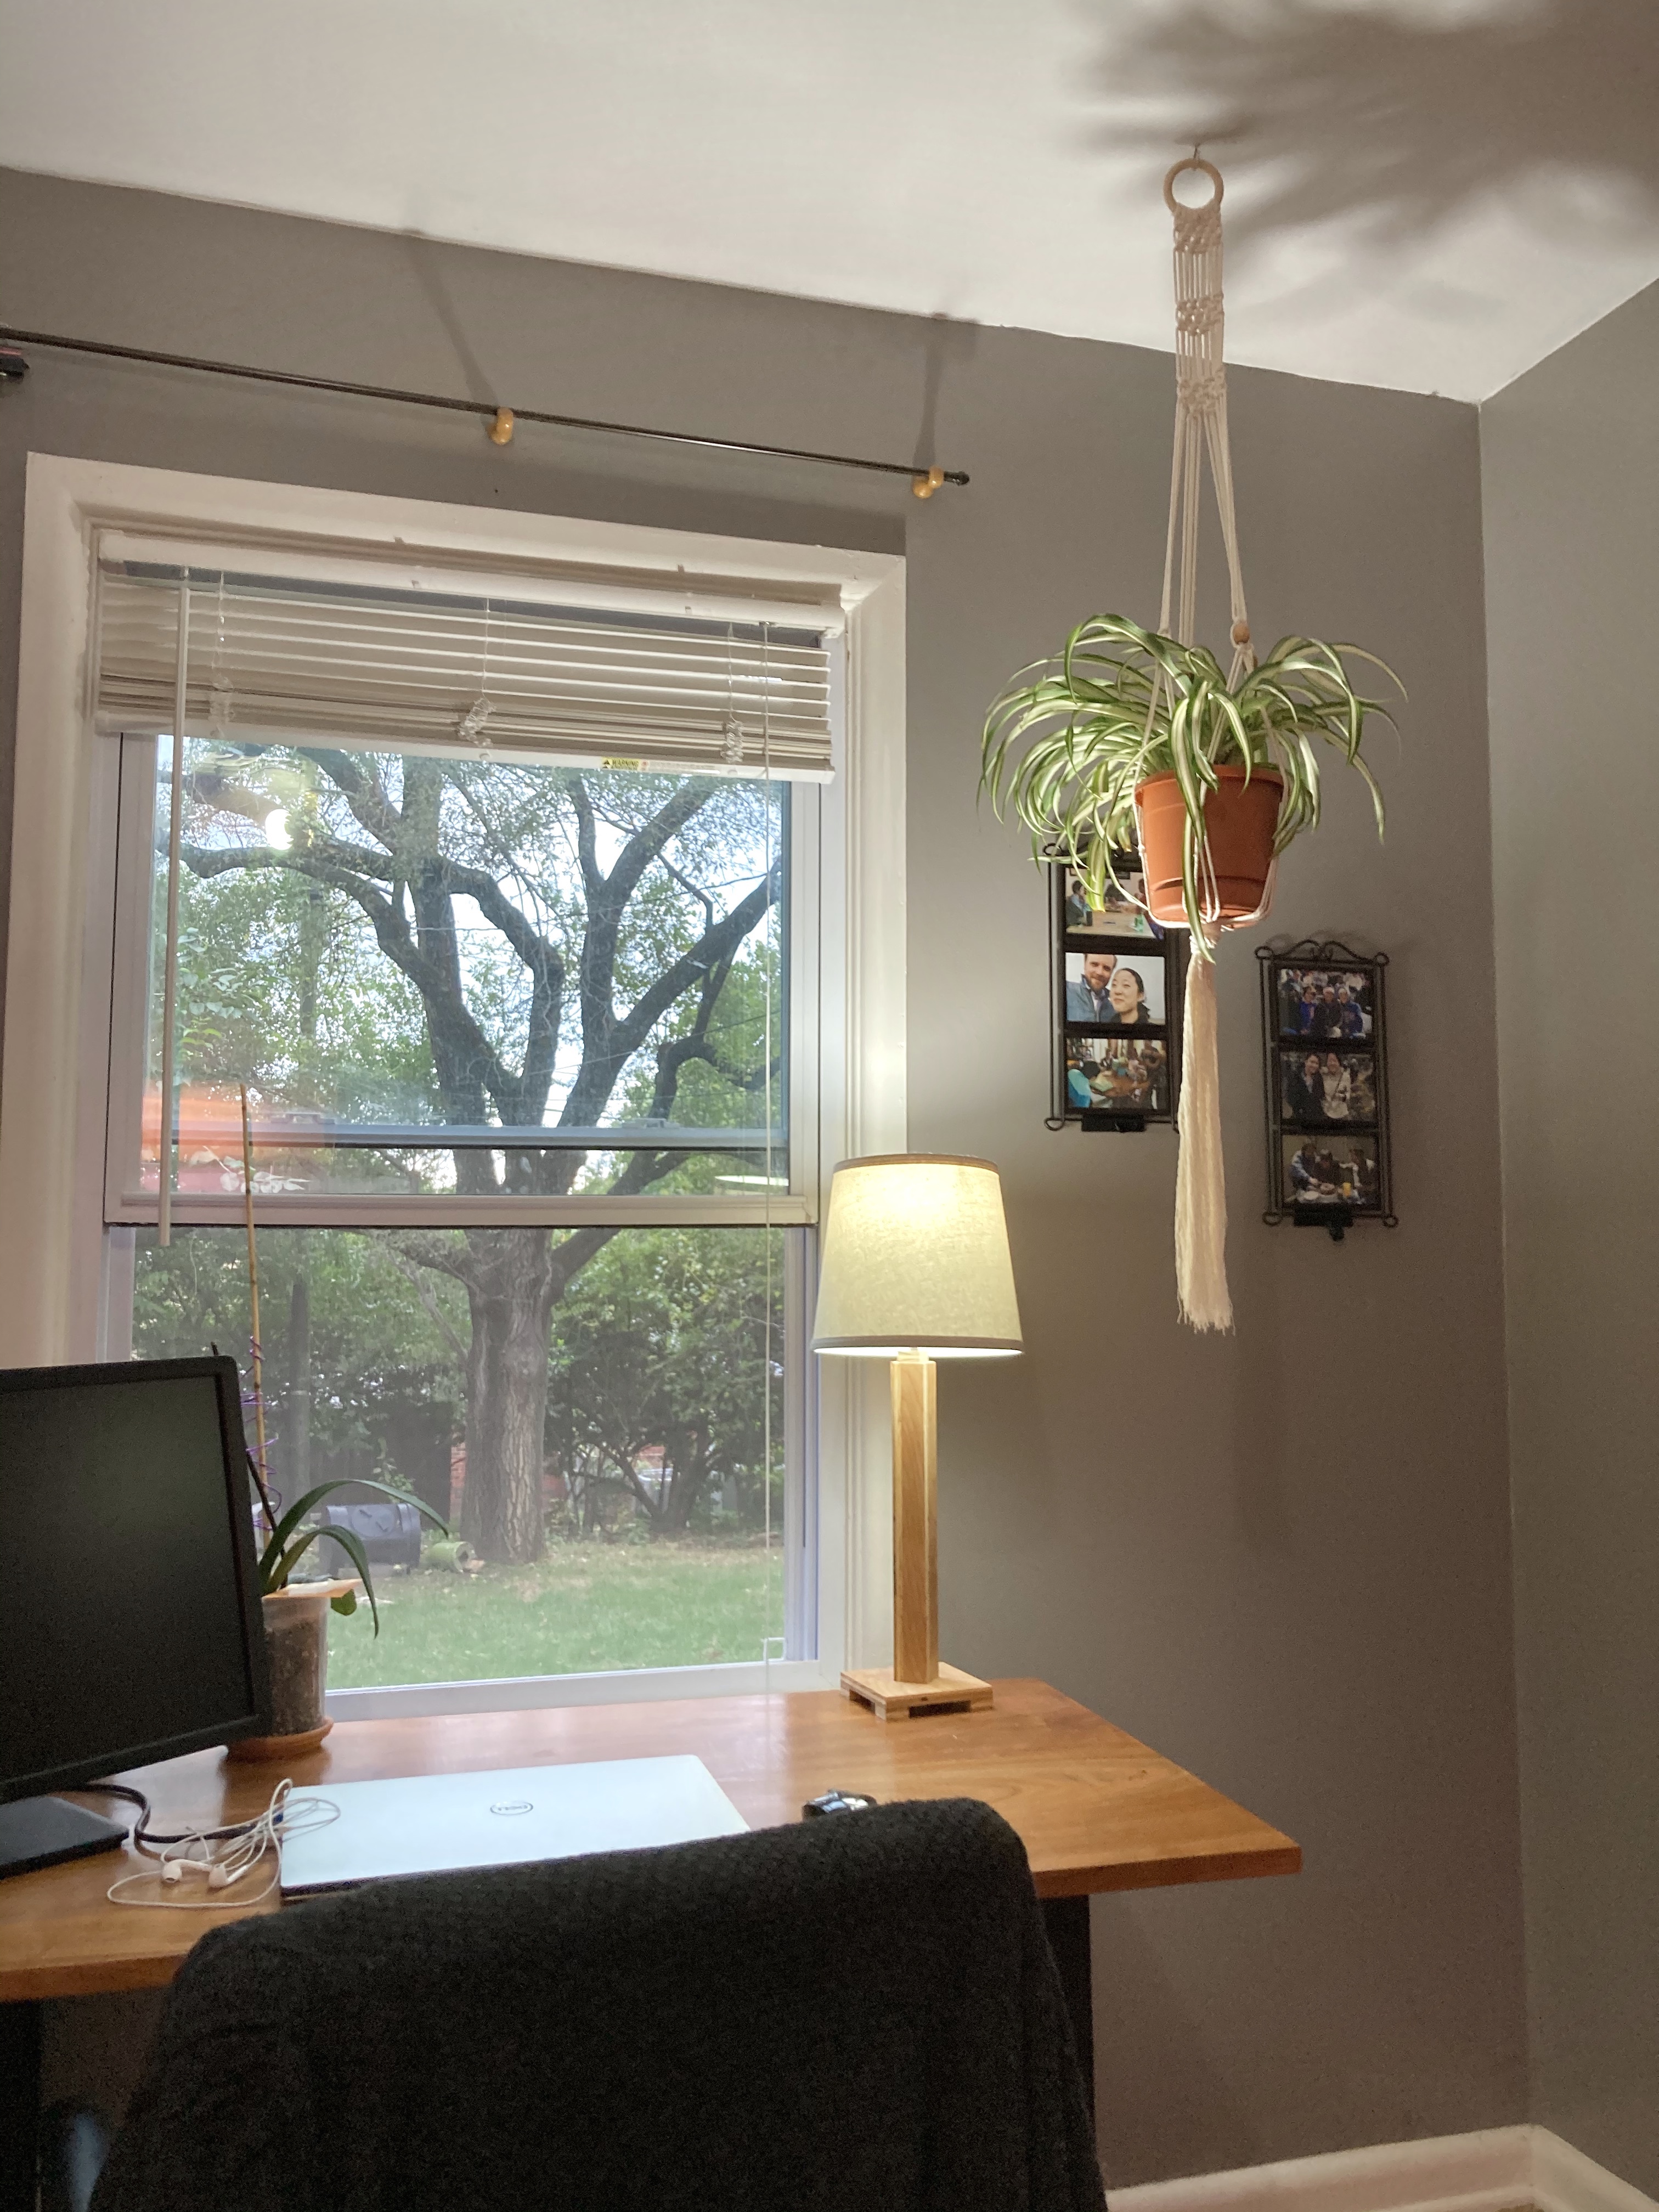
Complete! The plant hanger is still tall, even when Ian holds it up.

Ian screwed a hook into the ceiling of my home office for me. I spread the netting around the base of the pot and carefully arranged the leaves of my spider plant through the hanging strings.


The spider plant fits in the pot holder perfectly. Here is a close up of the the strings around the pot and the very fluffy tail.

I’ve been planning this macrame plant hanger for a while now and am happy with the results. If I get more hanging plants in the future, I’ll try out some different patterns. After watching videos online, there are SO MANY different knots and patterns to try.
Anyway, this is a fun and easy project for amateur crafts people. Buying a macrame kit online makes the supply gathering easy, and even with a simple square knot you can create many designs. I definitely recommend making your own plant hanger if you need one!
Leave a Reply