March in Kansas… cold weather with hints of sunshine. As Charles Dickens once wrote, “It was one of those March days when the sun shines hot and the wind blows cold: when it is summer in the light, and winter in the shade.”
Spring is here, and the last frost is roughly four weeks away. Now is the time to start seeds indoors.
I learned about a new method for starting seeds recently. Instead of planting seeds inside of pots, you can shape cubes of soil, which stand freely with no container. The idea is that plants will “air prune.” When roots reach the edge of the soil and hit the air, the root stops growing.
Somehow this lessens transplant shock when putting mature plants outside. I don’t know how it works.
Anyway, it saves on containers and looks fun!

The official way to create soil blocks is to use the soil blocker tool. As seen in the above photo, the typical soil blocker is made of steel, with a plunger apparatus on top, then four cubed chambers below. You pack the chambers with soil then push them out.
You can buy them in larger numbers, like six, eight, or twelve cubes at a time, and in different sizes. So really tiny squares for tiny seeds and larger squares for bigger plants. They have fancy attachments, so it punches different sized holes on top for the seeds. Some blocks are designed to fit inside of each other, like nesting dolls, and when a sprout grows bigger, you slide the small block of soil into a bigger block of soil.
With making several blocks at a time, you can understand how market farmers or nurseries might appreciate such a tool. You can make many blocks quickly!
As such, these soil blocker tools can cost a pretty penny. Maybe around $40 to $60 for a four-celled tool. Yikes.

There must be DIY methods for making blocks of soil at home, right? In fact… there are! People had creative ideas on YouTube, like making molds out of soda cans or PCV pipes, but those methods were fussy.
Enter: the 3D printer. I remembered we have a 3D printer and Ian likes 3D printing, so this was a win/win scenario! We downloaded this Soil Block Maker design created by Slatemeta on the Thingiverse website. Ian says the design worked fine and the 3D printer had no trouble.
Ian used a rainbow filament, so the color gradually shifts and has a pretty shimmer on the exterior. Almost like chrome… very space age and futuristic. Nice!


Here’s a close up of the 3D printed model. One half is the cube, the other half is the plunger. Beneath the plunger is a round part that creates a hole in the soil for seeds.
With this model, you only create one soil block at at time, but that’s perfect for my needs.

Here’s my materials for making soil blocks. It’s best to follow a soil recipe so the blocks keep their shape.
My recipe: one part potting soil, one part peat moss (or substitute with coco coir), and one part vermiculite. This mixture creates a sticky soil that retains a lot of moisture.
Other materials: a big container for mixing the soil, two disposable cake pans plus their lids for holding the finished soil blocks, scraps of cardboard to create a flat surface in the pan (and wick moisture for even water distribution), a hand shovel for stirring, and the soil blocker tool.
Optional: one beer for drinking.

I put a layer of cardboard in the cake pans. The cardboard gives a flat, even surface for soil blocks to sit on. Hopefully, the cardboard wicks moisture, too. So water evenly reaches all the blocks when pouring watering into the pan.
You should water from the side or below, as watering from above will dissolve your soil blocks. They are delicate.

Here is the potting soil, peat moss, and vermiculite mixed together in a storage container. I added water from the hose spigot outside.
You need a lot of water! The consistency should be very wet but lumpy, like brownie batter. When taking a fistful of soil and squeezing, water should squeeze out. The soil should maintain its shape without falling apart. Like play-doh.


Attempt one. The first soil block!
Scoop soil into the cube. Pack it down, then wipe away extra dirt. Push down on the plunger and cover the opening with your other hand to squeeze out wster. This action packs the soil into a tight cube.

Then push the soil out. It made a beautiful soil block! Notice the hole on top for seeds. The design worked perfectly. I am happy with this result.

It’s fun if you don’t mind dirt. Ian took over from here and knocked out 80 soil blocks within half an hour. That equals 20 soil blocks per cake pan. Wow! That’s a lot of plants.


I planted veggie and flower seeds into the soil blocks. Best practice is to put 2-3 seeds per block to ensure at least one seed will germinate and sprout. I covered the seeds with soil and a layer of vermiculite.
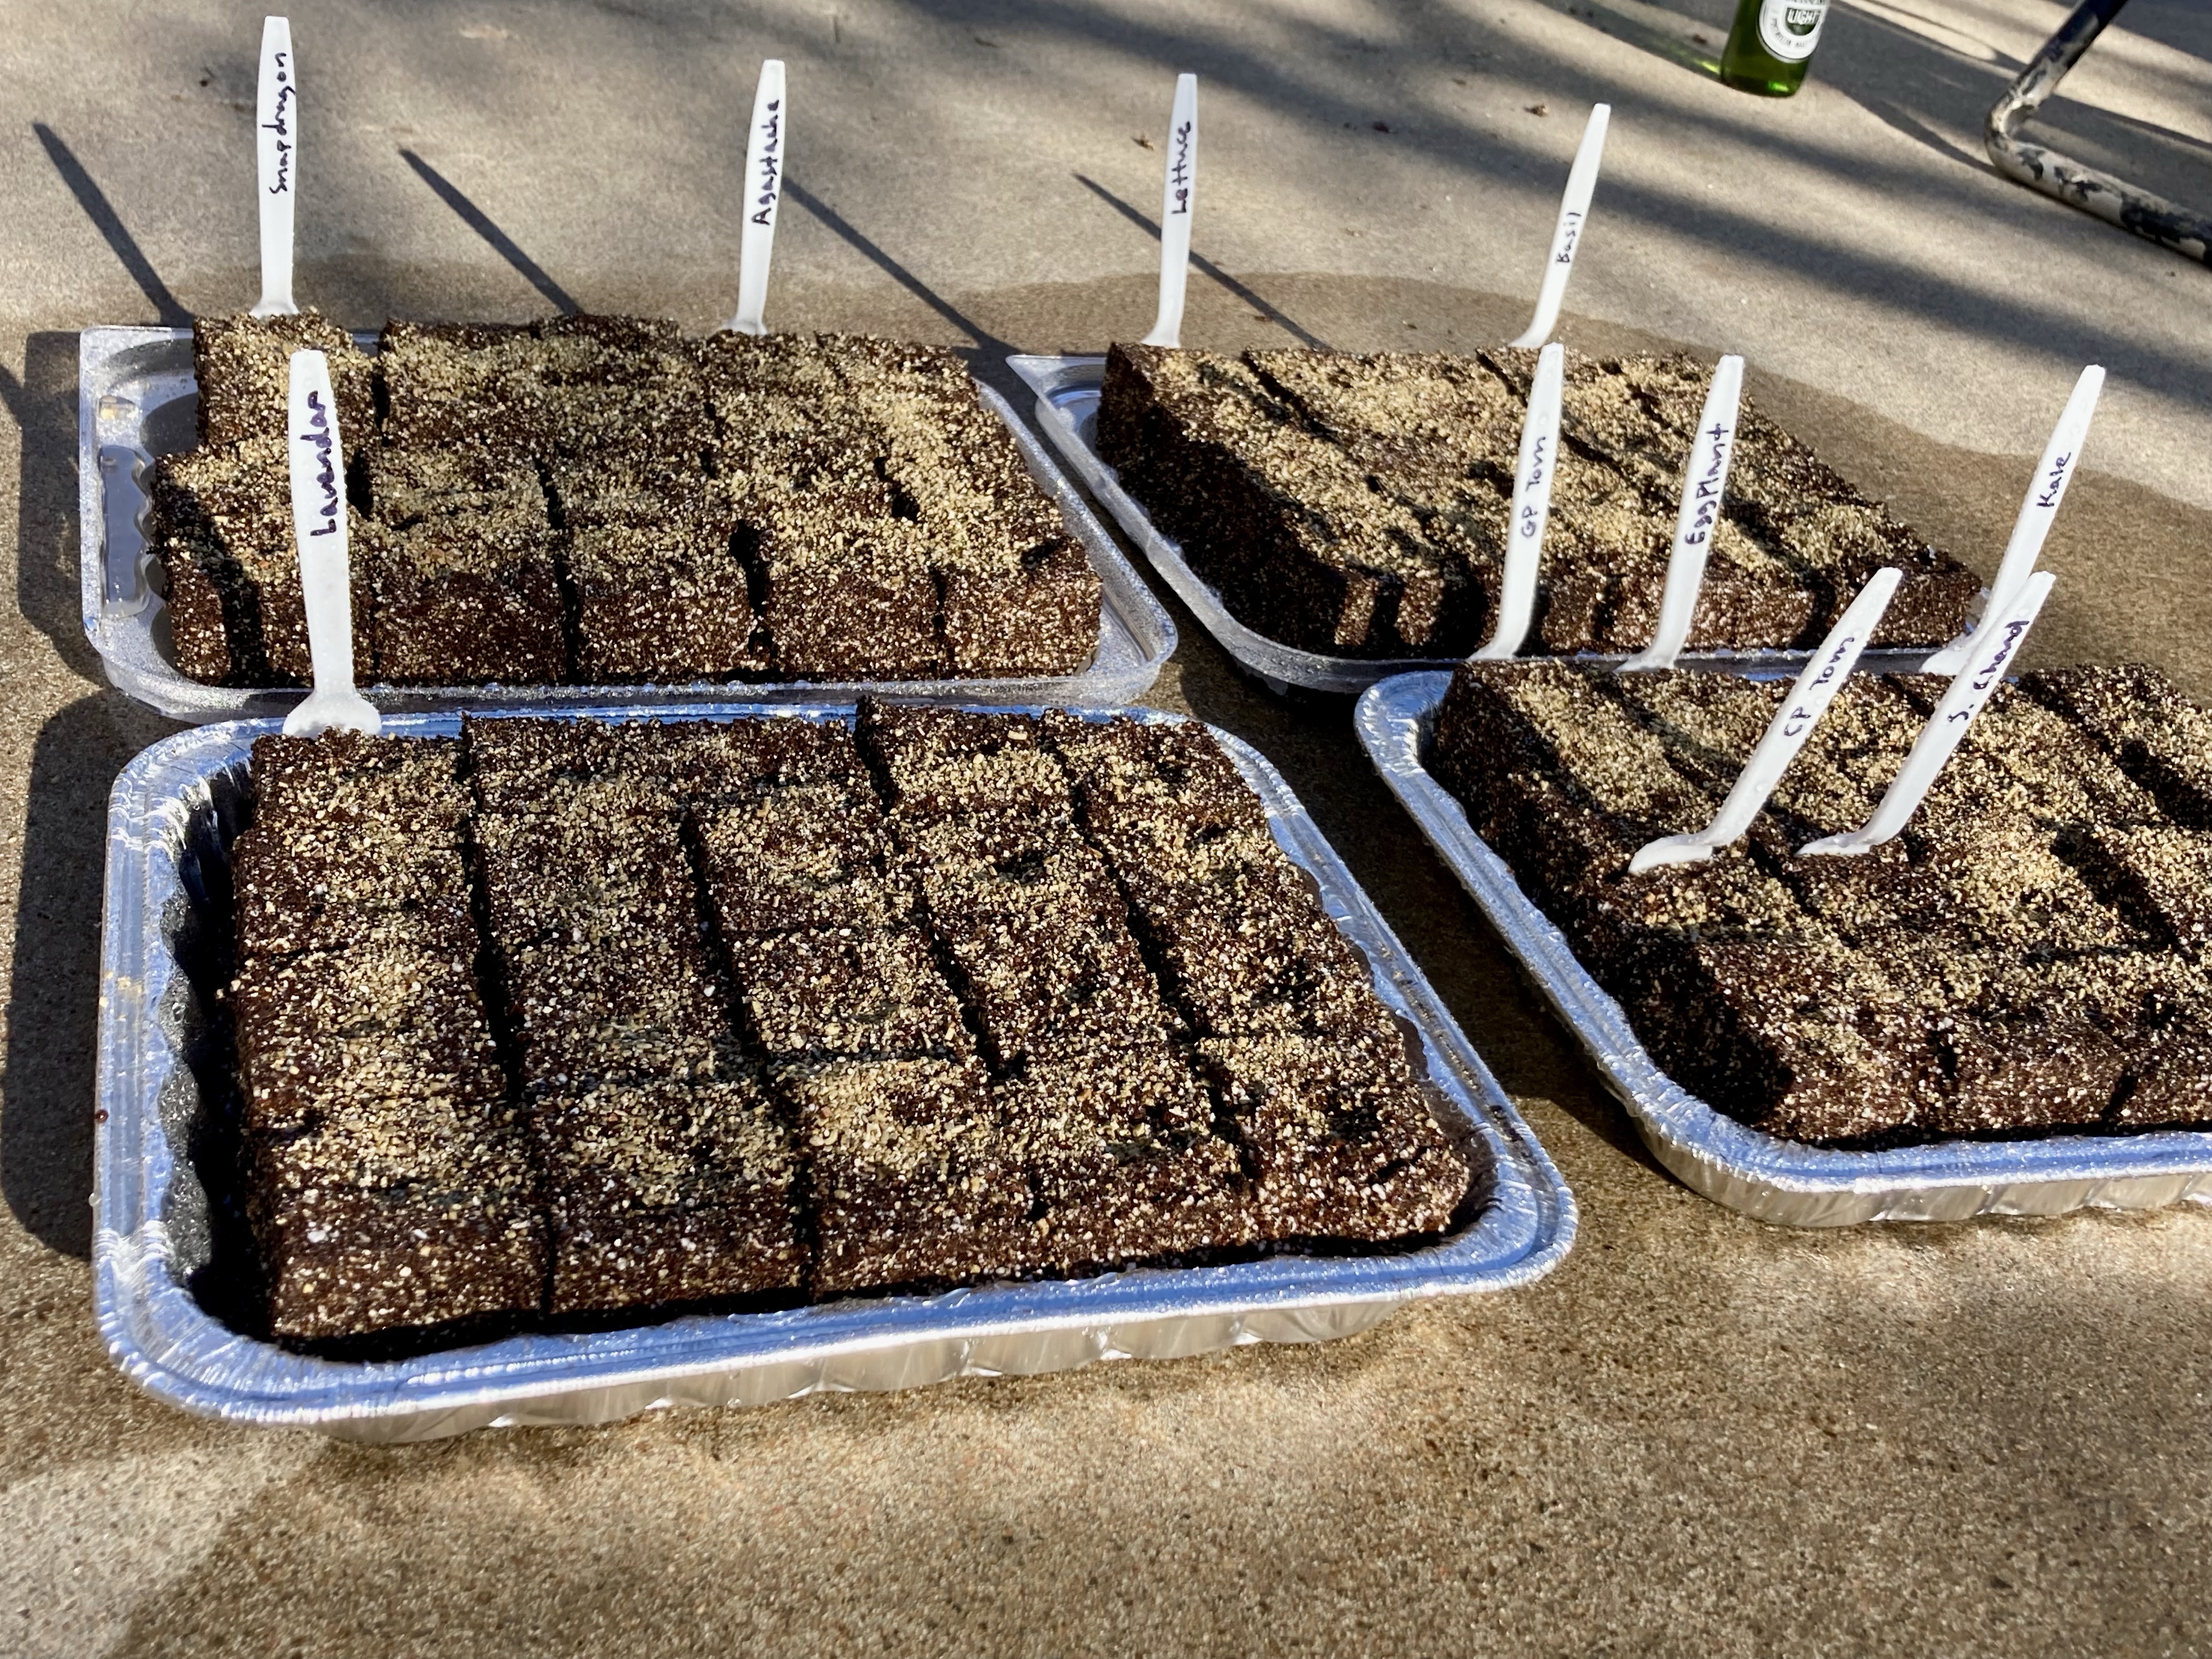
For these blocks, I planted basil, eggplant, kale, lettuce, swiss chard, and tomatoes. These veggies are great for transplanting outside once they’re big enough.
Plus some flowers: lavender, agastache, and snapdragon.

I watered the seeds outside with a watering can (pouring from the edge of the pan) and used plastic forks as labels.

Our setup inside the house. We have a utility room downstairs. The workbench is a good countertop.
It looks silly, but it works! A plastic sheet underneath the pans, in case dirt or water spills over. Foil around the walls to help bounce light. Then a couple of plant lights overhead. The lights are connected to timers, so turning the lights on and off is automated.
By the way, seeds need A LOT of good lighting to germinate. Put the lighting close to the soil surface, such as 4-6 inches above. You do not need special grow lights for this process. Regular white lights are fine, too.
Preferably, keep the area warm. Some people put heating mats beneath their grow trays, which seedlings love. I do not have extra heating for my seeds, but the suggestion is helpful.
When the seeds sprout, turn on an overhead fan, or aim an oscillating fan at the seedlings, for part of the day. The breeze strengthens the stems. They become nice and strong for the outside, and less leggy. Keep the soil moist but not drenched.


One week later… the lettuce, kale, and swiss chard sprouted. Super cute.
When the sprouts are bigger, I’ll thin them out. Only one plant per soil block. It’s optimal for growth.
Leave a Reply